

Manually Connecting on Windows
Mendoza Network Drives (M, P, R)
Map the Research Database Server:
- Click on the Windows key + E to open File Explorer
- Click This PC from the left side of the window
- Click Map network drive.
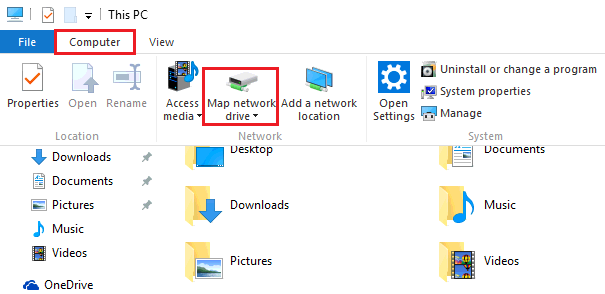
- In the window that opens, choose the drive letter you want to connect to from the Drive list.
- In the Folder box, type the path to the shared network folder
- M: \\mcob.corpfs.nd.edu\mcob\
- P: \\mcob.corpfs.nd.edu\mcobent
- R: \\mcob.corpfs.nd.edu\mcob\research
- T: \\mcob.corpfs.nd.edu\MendozaEdTech
- Check the box to Reconnect at sign-in
- Note: If you do not login to the computer with your current ND Netid and Password, you will need to tick the box to Connect using different credentials. For username, type ADND\yournetid, and for the password, type in your current ND password.
- Click Finish.

Connecting From Off-Campus
M Drive Access from Off Campus
-
Login to the VPN at https://vpnaccess.nd.edu
-
Connect to Network Drives
For Windows:
- Download the drive mapping script GuestMap.exe
- Double click the GuestMap.exe file to install the Connect to Network Drives script (the shortcut will appear on your desktop)
For Mac:
- Follow the instructions at the bottom of this page.
Manually Connecting on Mac
This entry contains two sets of instructions:
- Directions to make a network drive connection on your mac.
- Directions to automatically reconnect this connection each time you turn your computer on while connected to the Notre Dame network.
1. How to connect to/map to a network drive like the N drive or M drive.
-
Close any open applications.
- If you are using wireless, make sure it is ND-Secure
-
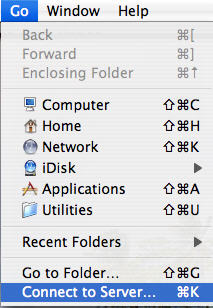
At the top of the screen, click on the Go menu item, and select Connect to Server....
-
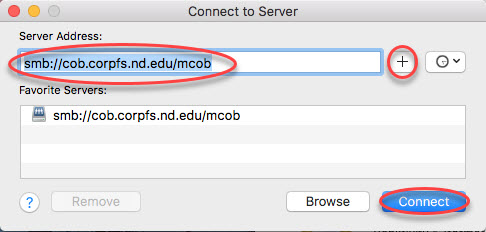
In the Connect to Server window, enter one of the following paths at a time.
-
M drive: Enter smb://mcob.corpfs.nd.edu/mcob
-
- Click the + next to the server address to remember it as a favorite connection and then click Connect.
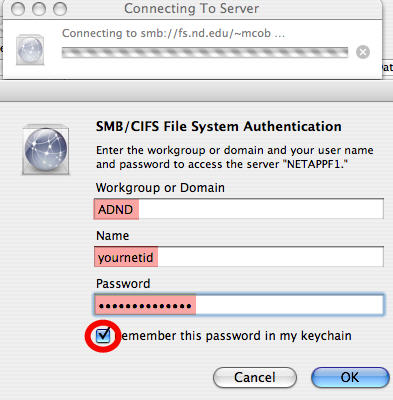
- When the login window is presented, the Workgroup or Domain should read ADND. Under Name enter yournetid. Under Password enter your Notre Dame password. Check the box next to Remember.... and then click OK.
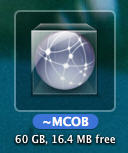
- If the connection is made successfully, the file space will open and a network drive icon like the one pictured here will be displayed on your deskop.
2. How to automatically reconnect a network drive each time your computer starts while connected to the Notre Dame network.
-
Follow the instructions above to connect to one or more network drives.
-
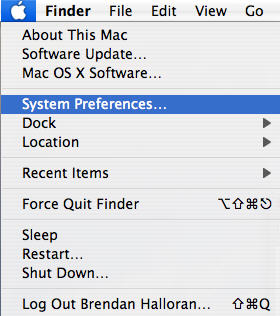
Click the Apple at the top left corner of your screen and choose System Preferences....
- Click on the Accounts icon.

-
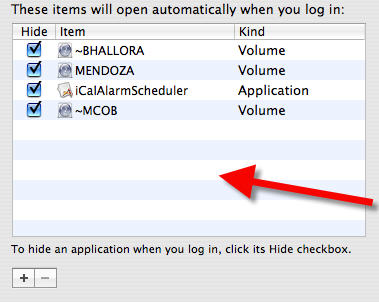
Click on the Login Items tab near the top of the Accounts windows.

- Drag the icon/s for each network drive you would like to automatically connect to into the window as indicated by the arrow in the picture below.
-
Close the Accounts window. These drives will now automatically reconnect the next time you startup your mac.